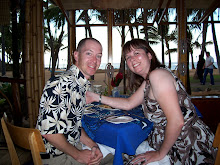
Saturday, May 15, 2010

Monterey Trip 2010

We really love the Monterey area of California, and we are lucky enough to have an excuse to go to Monterey every year for the annual Sea Otter Classic bike race. The event takes place at the Laguna Seca raceway, about halfway between Salinas & Monterey, and the Platinum team has stayed in Carmel for the last several years at the Hofsas House. Hofsas House is a cheaper option for anyone wanting to stay in Carmel without paying exorbitant rates. We love that the team pretty much takes over this place when we are here, and it is rare that there isn't at least one person we know hanging out by the pool or cleaning their bikes in the parking lot. Here are some pictures of Hofsas House:
Driveway artwork - Right before the driveway drops off in a ridiculously steep grade that the team refers to as "Mr. Toad's Wild Ride." It is so silly the husband had to take a picture.
View from the upper level balcony. Weather was awesome while we were here.

This year, I managed to avoid going into the expo area at the race. This is the largest race expo in the country, and it is overwhelming at times for me. It costs $10 a day for spectators just to go in and walk around. I have found ways around this fee (usually involving picking up scraps of racer wristbands and cobbling them together to make my own) because I think it is ridiculous to charge the friends and family money just to get in to the area where you are able to spend MORE money for food & drinks. This year, I avoided the expo altogether and hung out at the hotel or went out with the other wives of the team. Here are just a couple of pics that the husband got (his entry was free as a racer) of the madness:

Before crossing the bridge over the racetrack into the insanity

Just one of the booths - We do love Specialized in this family!

I am rather proud of how well researched I was on this trip. I didn't take pictures at all the restaurants we ate at, but there were some that were worth mentioning even without the pictures. I used Yelp and Trip Advisor extensively to research the types of food we were interested in and to find the best options for our entire group. The first night there, I inadvertantly ended up planning the "team dinner" as more and more couples signed up to join the husband and me at our chosen dinner spot, Little Napoli. The husband is very particular about where/what he eats the night before a race, so I chose this place for its simplicity - Italian food in an American style where you know what you are getting when you order spaghetti & meatballs. We ended up with a table for 12, which was a great size, since everyone was able to interact and no one was left out. Everyone seemed to enjoy their meals, especially my husband, who got a spicy pasta with swordfish that he really enjoyed and was a perfect fit for his pre-race needs. The next night, the race was over and we were both exhausted after a long day (husband got 12th, see team website for all the team successes and photos by me!). We decided to celebrate with Mexican food and some margaritas. I found Club Jalapeno on Yelp and never would have found it otherwise, since it is tucked inside a business area courtyard. This place was fantastic. The sauces are unique combinations. I loved the Spicy Yellow Pepper sauce with my beef tamale (roasted yellow bell pepper with habaneros), and the husband thought the Oaxaca style Mole sauce was better than any other he had tasted. Several teammates went here the next night and loved it as well.
Now, onto the food that we DID take pictures of. We had eaten at Katy's Place for breakfast last year, and knew we wanted to go back again. The husband is a big fan of eating out for breakfast, and even my small breakfast eating self enjoyed Katy's Place enough to return. It is expensive, and cash only, but it is a fun environment and has very tasty food. Although they are known for their Benedict items, we have yet to try any of the benedict combos, since we aren't huge fans. The husband's banana chocolate chip pancakes did start a trend, however. After his plate was delivered, we saw several people ordering by saying: We want THAT! I got a delicious strawberry waffle and a hot chocolate:


We also ate at the Sardine Factory, which was our "fancy" meal of the weekend. We had a few recommendations for this location, so we made reservations and headed over to the Cannery Row area. We accidentally stole another couple's table (I swear they said "Moore!"), but thankfully, they were able to accomodate both parties in the lovely conservatory room. We dined on their famous abalone bisque, the albacore special (Husband) and Sole Americana (me - Sole with Diver Scallops and Lobster pieces over local greens, yum!) and finished with their Chocolate Marquis Cake, which was fantastic:


Of course, we also visited the aquarium. We don't visit every year, because it is expensive and doesn't always work into our schedule, but it is a really well run show here at Monterey Bay Aquarium. They are very passionate about saving the oceans and have become known across the U.S. for their sustainable fish consumption guide. I don't always abide by the guidelines while dining out, but I do try and choose sustainable options when buying fish to eat at home. Here are some of my favorite pics of the many I took at the aquarium (having an SLR at an aquarium makes picture taking much more fun!). We loved the sea dragons/horses and the jellyfish, and I think I'm in love with that little sardine with his mouth open!

Brown Sugar Meatloaf

Sorry for the very long hiatus! The good news is that I've been tasting & touring for the last month and have lots of posts to catch up on. But my adventures have kept me away from my blog far too long and so now, I begin the catch up - starting with a recipe that uses ketchup! Ha ha!

Meatloaf is a classic recipe that many people consider a staple. I grew up with a pretty standard meatloaf recipe that included dry onion soup mix, bread crumbs and eggs, with a basic ketchup glaze. It was always just okay, so I was never really inspired to try it out on my own. But lately, with my food blog, I've decided to try making some of the classics on my own, utilizing the techniques I've been learning through the blogging world, plus adjusting for our personal tastes. Meatloaf was back on the list of potential "to-try" recipes. This recipe received some pretty rave reviews on allrecipes, and we do like savory items sweetened with brown sugar, so I thought I'd start there. I added some worcestershire sauce and Tabasco to the glaze and we really enjoyed that added kick to the glaze. Spicy and sweet just go so well together! This meatloaf was very moist and was tasty on sandwiches the next day. Everything a meatloaf should be in my book! I'm thinking of making this with a mix of beef and turkey next time, so that it is a little lighter. But as it was, it wasn't too greasy, since I used a pretty lean mix of ground beef. Good recipe.


Brown Sugar Meatloaf (adapted from allrecipes)
1/2 cup packed brown sugar
1/2 cup ketchup
(added: 1 Tbs Worcestershire Sauce)
(added: 1 tsp Tabasco Sauce)
1 1/2 pounds lean ground beef (I used 93/7% Lean/Fat ratio)
3/4 cup milk
2 eggs
1 1/2 teaspoons salt
1/4 teaspoon ground black pepper
1 small onion, chopped
1/4 teaspoon ground ginger
3/4 cup finely crushed saltine cracker crumbs
Preheat oven to 350 degrees F (175 degrees C). Lightly grease a 5x9 inch loaf pan.
Press the brown sugar in the bottom of the prepared loaf pan. Mix ketchup, worcestershire sauce and Tabasco in a small bowl. Spread on top of the brown sugar in loaf pan.
In a mixing bowl, mix thoroughly all remaining ingredients and shape into a loaf. Place on top of the ketchup. Bake in preheated oven for 1 hour or until juices are clear. Allow to cool for 10 minutes prior to slicing.

Wednesday, April 14, 2010

Tofu Parmesan Florentine

I knew I wasn't going to use an entire block of tofu on the Peanut Tofu recipe, so I figured I'd want another great tofu recipe to try with the remainder before it went bad. I looked no further than Mary Ellen's blog. Mary Ellen has some great tofu recipes because she really experiments with it when her husband is out of town (since he doesn't like it). I know that I make some of my favorite experimental recipes when my husband is out of town, as it really gets the juices flowing to know that if you fail, you can always eat cereal or ramen for dinner and not disappoint the husband! Anyway, Mary Ellen's Tofu Parmesan recipe looked fantastic. I made a couple of changes (I added some Parmigiano cheese and removed the dreaded mushrooms), but I loved this recipe. The husband declared it a "definitely make again" which is really saying something for a new tofu recipe. The key was that since Mary Ellen didn't list specific amounts on the spices for the breading, I went a little heavy on the cayenne (which I used instead of pepper flakes). Wow, the flavor of that spice, combined with all the other intense flavors, made me forget that I was eating "boring" tofu. The tofu turns an amazing golden color with the light pan fry because the square shape has more consistent contact with the pan than most other proteins would. After I pressed the tofu dry, I cooked the spinach first and used it as a bed for the tofu, sauce & cheese, which I then placed in the oven just until the cheese melted. This is not exactly healthy fare, but it is a healthier way of enjoying the flavors of chicken parmesan that I love so much without the deep fried chicken.

Tofu Parmesan Florentine (adapted slightly and halved from Mary Ellen's Cooking Creations)
1/2 block extra firm tofu
1/4 c bread crumbs and 1/4 cup parmigiano reggiano mixed with the following spices:
Spices: salt, pepper, garlic powder, oregano, onion powder, cayenne
1 egg, beaten
1/2 c marinara
1 bag baby spinach
1/2 c shredded cheese; I used mozzarella
1 tsp olive oil
Preheat oven to 375. Slice tofu into 1/2 inch slices. Press between two cutting boards with paper towels to remove most of the liquid. Heat olive oil over medium heat in non-stick pan. Saute spinach until just starting to wilt. Place in 11x7 baking pan, set aside. Dip tofu in egg, then in bread crumbs and add to hot pan. Cook until golden brown, about 2 minutes per side. Place on top of spinach in baking pan. Top each slice with marinara sauce and cheese. Bake uncovered for 20 minutes or until cheese is melted & bubbly. Serve over hot whole wheat pasta. Serves two.

Peanut Tofu

I have a lot of friends who celebrate Lent, and although I am not technically Catholic, I did go to a Catholic elementary school, and my mom was raised Catholic. I have given something up for Lent for the last several years, but I have yet to give up meat on Fridays. I realized at the end of Lent this year that it might be because my vegetarian repotoire is lacking a bit. I decided to try a couple new vegetarian recipes so that I can attempt meatless Fridays sometime soon. I started with Peanut Tofu because I realized while eating Peanut Chicken recently that the flavorful sauce would be great for tofu, which doesn't have much flavor on it's own. This was the best tofu recipe I have had, and I would highly recommend this for someone interested in experimenting with tofu, but is afraid of bland or weird textured food. I followed my standard tofu practices for this recipe - sliced into 1/2 inch to 3/4 inch slices, then press between cutting boards with lots of paper towels to dry. Then, sautee in a completely dry non-stick pan until very light golden and dry. Allow to cool before dicing into squares.

Peanut Tofu
1/2 package extra firm tofu, dried and diced into 1/2 inch to 3/4 inch cubes
1 medium red bell pepper, diced into 3/4 inch pieces
4 Tbs Low Sodium Soy Sauce
1 clove garlic, minced
1 tsp grated ginger
1/2 cup Picante Sauce (I use Pace Medium, and I double the sauce)
2 Tbs creamy peanut butter (I use reduced fat)
2 tsp canola oil
1/2 tsp sesame oil
Marinade tofu in soy, garlic & ginger 20-30 minutes. Heat oils in stir fry pan over medium high heat. Add bell pepper and stir fry until fragrant, about 1 minute. Remove, reserving as much oil as possible. Add tofu and stir fry until most of the marinating liquid has cooked off and become carmelized. Remove. In separate bowl (important!), combine picante and peanut butter and stir until mostly combined. Cold sauce will have a stringy consistency, sauce will blend as it cooks. Add sauce to hot stir fry pan. Cook & stir until thick and bubbly. Return peppers and tofu to the sauce. Stir well and cook until heated through. Serve over hot rice. Makes 3 servings when sauce is doubled.

Friday, April 2, 2010

Porcupine Meatballs

There are some recipes that I make quite often, only to find that I've never blogged about them. This is one of them. Perhaps because I know that not everyone has a pressure cooker, perhaps just because I've been eating these my entire life (although my family used a different recipe when I was younger), I don't know why I haven't blogged about these. They are such a cute recipe, and they are very tasty, too. I loved these as a kid simply because of the cuteness factor. They are called porcupine meatballs because all the rice sticks out of the meatball like porcupine quills. They come together easily in the pressure cooker and always come out tender and delicious.

Porcupine Meatballs (adapted from my Presto pressure cooker manual)
3/4 lb lean ground beef (I used 90% lean)
1/2 cup white rice, uncooked (I use short grain)
1/2 tsp salt
1/4 tsp ground pepper
1/2 Tbs dried minced onion
1 cup tomato juice (I use spicy V-8)
1/2 cup water
8 oz can tomato sauce
Combine meat, salt, pepper, onion & rice. Shape into about 12 small meatballs. Heat tomato juice & water in pressure cooker. Drop meatballs into boiling mixture, top with tomato sauce. Close lid and cook for 10 minutes with pressure regulator rocking gently. Allow pressure to drop of its own accord. Serve over hot rice, spooning juices on top. Makes 3 servings of 4 meatballs.

Island Spiced Pork Tenderloin

I've seen this recipe pop up on a couple of blogs recently, but it wasn't until I saw it on Annie's Eats that I realized that these island spices aren't what I originally thought they were. I hear "Island Spiced" and I think more along the lines of Hawaii - perhaps a macademia, pineapple or coconut concoction. These spices are more Caribbean in nature, and the recipe is a combination of items that you are likely to have on hand most of the time. This is a delicious combination of smoky, spicy and sweet, which are all flavors I love with pork. A few things to note: The "glaze" starts out quite dry, not like a traditional glaze at all, more like the texture of moist sand. Annie halved her glaze amount, but I left it at her measurements for only one tenderloin, so I guess it was back to the original amount. Also, I cooked the pork to an internal temp of 170 degrees, as that is our doneness preference for pork (no pink, but still very moist all the way through). This came together quickly and was a nice variation from our usual pork tenderloin recipe. I'll definitely be making this again.


Island Spiced Pork Tenderloin (from Annie's Eats, originally from Gourmet)
For the spice rub (I halved these amounts for one tenderloin):
1 tsp. kosher salt
1/4 tsp. ground black pepper
1/2 tsp. ground cumin
1/2 tsp. chili powder
1/2 tsp. ground cinnamon
1/4 tsp. cayenne (I added this)

1 pork tenderloin (about 2-2½ lbs. total)
1 tbsp. olive oil

For the glaze:
½ cup packed dark brown sugar
1 tbsp. (2-3 cloves) finely minced garlic
1½ tsp. Tabasco sauce
Preheat the oven to 350˚ F. Combine the salt, pepper, cumin, chili powder and cinnamon in a small bowl. Stir together to blend. Pat the mixture over the pork tenderloins. Heat the olive oil in an ovenproof 12-inch skillet over medium-high heat. Place the tenderloins in the skillet and brown on all sides, turning occasionally, about 4 minutes total. Remove from the heat, leaving the pork in the skillet.

Stir together the brown sugar, garlic and Tabasco in a small bowl until blended. Spread the mixture evenly over the tops of the tenderloins. Place the skillet in the preheated oven and roast about 20 minutes, until an instant-read themometer inserted in the center of each tenderloin registers 140-170˚ F. Loosely tent the skillet with foil and let stand 10 minutes before slicing and serving.

Pressure Cooker Chicken Tacos

This recipe is a variation on a family favorite that we got to try this Christmas when we visited the midwest. I've been telling the husband for years that we should try his family's famous pork tacos with chicken, but I make the recipe so rarely that he was afraid of trying something new and ruining his once a year taco experience. I'm so happy that he enjoyed this version when we were visiting the rest of the family during the holidays, because these are so much healthier than the pork version that I'm much more likely to make them more than once a year for him. Thanks to the two K's (my sisters-in-law) for forcing my husband to try Chicken tacos! I surprised him by making these during the week this week and he was so excited he almost couldn't believe it. It's the little things in life, I guess!

Pressure Cooker Pork Tacos
Step 1 Ingredients:
2 lbs boneless skinless chicken breast, diced into 1" pieces
1 medium onion, diced
2 garlic cloves, minced
1/2 cup water
Place above ingredients in pressure cooker. Once pressure regulator is gently rocking, cook for 15 minutes. Remove from heat and allow pressure to release of its own accord. Remove pressure cooker lid and shred chicken.
Step 2 Ingredients:
1 28 oz can diced tomatoes
1/2 tsp freshly ground pepper
1/2 - 3/4 tsp of ground red pepper (cayenne)
Add Step 2 ingredients and mix well. Stir well and allow to simmer on medium low for about an hour or until nearly all the liquid is absorbed into the meat. Serve with soft flour tortillas and usual taco toppings (traditional for my inlaws include shredded lettuce and chopped tomatoes, but extended friends & family like cheese and sour cream, too). Makes about 6 servings of 2 tacos (but good luck stopping at 2!).